Ingredients

Preparation Time : 15 mins |Cooking Time:40 mins | Serves : 6-7
FOR THE CAKE
All purpose flour 1 and 1/4 cup
FOR THE CAKE
All purpose flour 1 and 1/4 cup
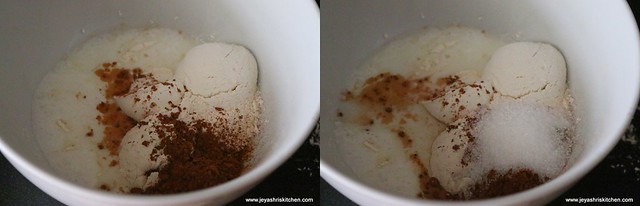
Cocoa powder 1/4 cup
Yogurt |curd 1 Cup
Oil 1/2 cup
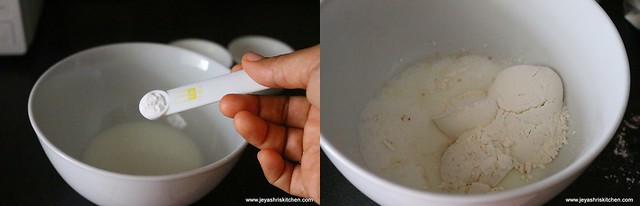
Baking soda 1/2 tsp
Baking Powder 1 and 1/2 tsp
Sugar 3/4 Cup
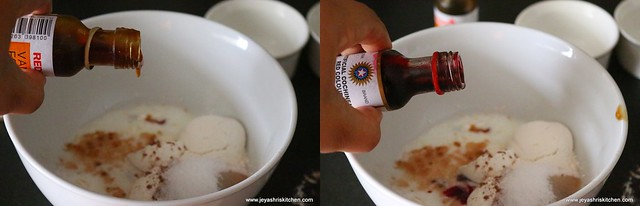
Vanilla essence 1 tsp
Milk 1 tsp
FOR THE ICING
Whipping cream 3/4 cup
Whipping cream 3/4 cup
Sugar 1/4 cup
Corn flour 2 tblsp*

Method:
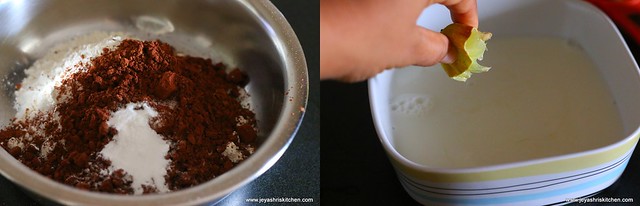
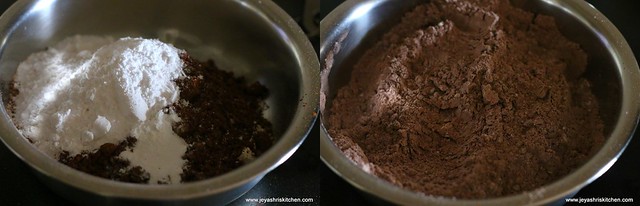
- Sift the flour, cocoa powder, baking soda and baking powder so that they will be mixed evenly.
 |  |
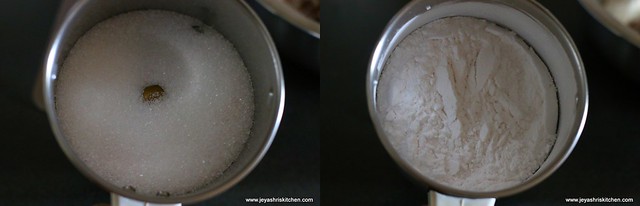
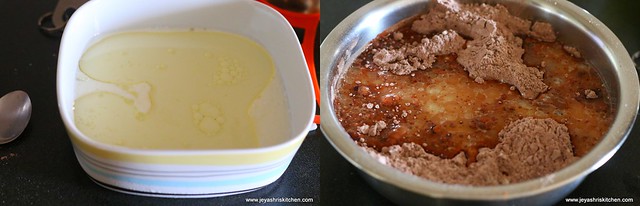
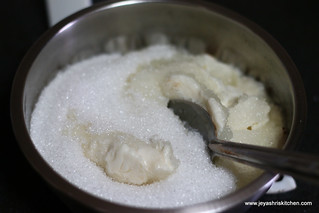
- In a separate bowl, add the yogurt and sugar and allow the sugar to completely dissolve .
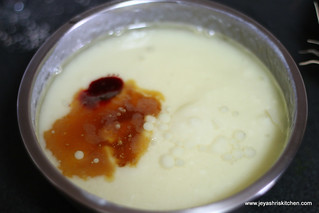
- When dissolved, add the oil and the vanilla essence and the red food color. Adding red colour is optional. I wanted to make a red velvete cake, but unfortunately it didn’t give out the red colour.
 |  |
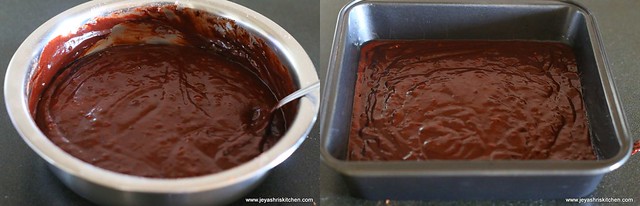
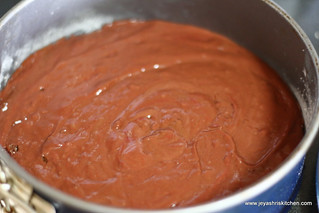
- Mix well and slowly add it to the sifted flour mixture and mix well. Preheat the Oven at 160 degrees for 10 minutes..
 |  |
- Grease the cake pan and dust it with some flour. Pour this cake batter to the cake tin.
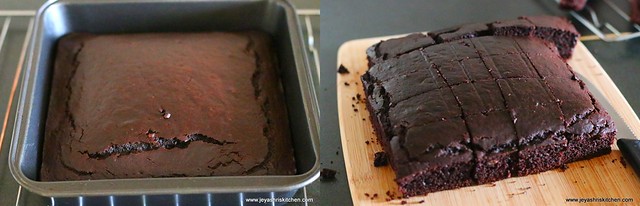
- Bake this for 35 to 40 minutes. Insert a tooth pick to the centre of the cake and if it comes out clearly the cake is done.
 | 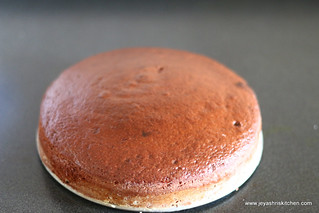 |
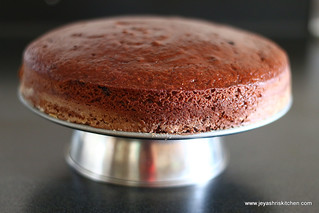
- Allow this to cool completely and put a cling wrap on this and keep it in the refrigerator for 4-5 hours.
- Let us make the icing. Before that keep the Whipping cream in the freezer for 15 minutes. Also freeze the vessel in which you are going to whip the cream.Keep the blades too in the refrigerator. Always use a tall vessel or a wide bowl, so that the cream will not splutter while whipping.
- Powder the sugar and cornflour together, if using icing sugar no need to powder it.
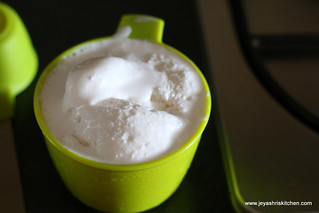 |  |
- Whip the cream till it forms a soft peak. Mine took 8 minutes. I used the REDMAN brand whipping cream which we get here in Phoon Haut shop.
- I used my electric hand blender.
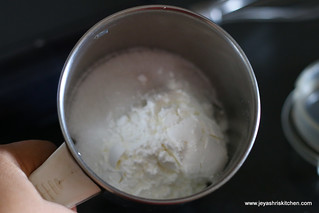
- After that add the powdered sugar mixture to this and beat well. If adding agar agar powder, add now.
- Agar agar gives firmness to the icing and will not melt even if it kept in room temperature.
- After adding sugar mixture the cream will become more firm too.
 |  |
- Till you start the icing keep the mixture in the freezer.
- When you are ready to make the icing, take out the cake from the refrigerator and place the cake in a plate and keep it on a inverted bowl. This step is to make the cake easily movable while doing the icing. Hold the plate in one hand while doing the icing.
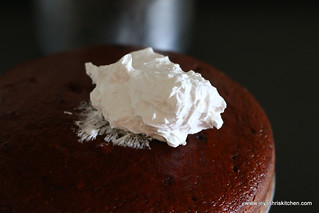
- Using a spatula or a butter knife start doing the icing. Put a portion of the icing mixture on the top of the cake .
 |  |
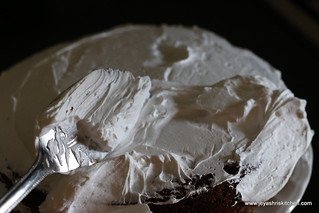
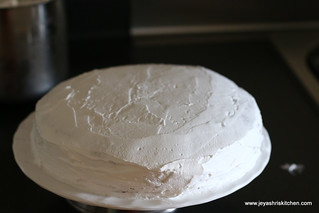
- Spread the mixture evenly with a spatula. Carefully spread first on the top and slowly do it for the sides. Mine was bit uneven as i was doing for the first time.
 | 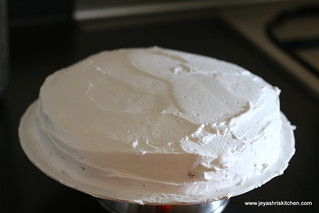 |
- Wipe out the extras spread on the plate and keep this cake with icing in the freezer for and hour.
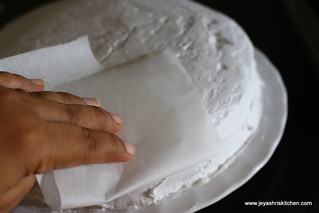
- This will be dry now and using a butter paper level the cake to get a clean even look.
 |  |
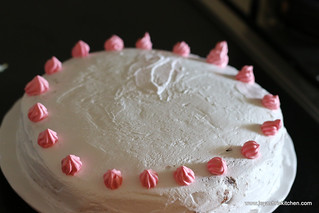
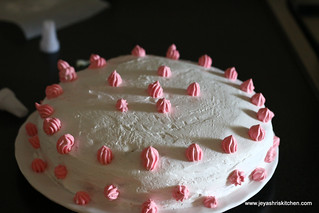
- I decorated with the cake in a very simple way.
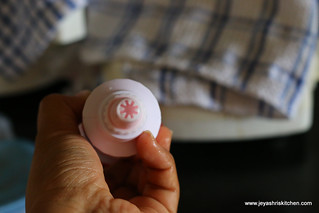
- I used a icing nozzle and filled up with cream and did some decoration.
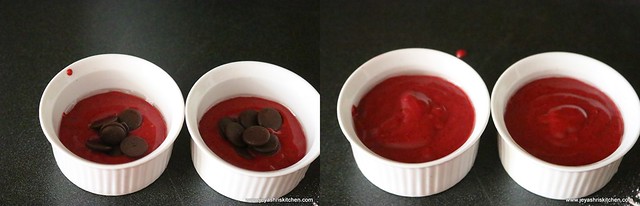
- I used the food colour which i used for the cake.
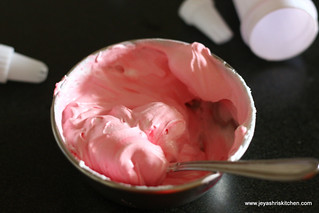
- Take 3 tblp of cream in a bowl and add a drop of the red cherry color to this and mix well. Fill this mixture in the tube and cover the piping tube.
 |  |
- Feel free to do the decoration according to your won imagination.
- I used some colored sprinkles to fill the gap.
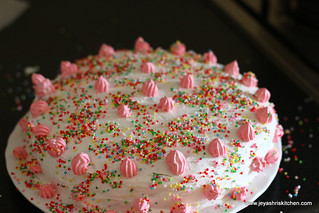
- Slice the cake and enjoy the cake. The cake was spongy and it tasted so yummy with the whipping cream icing.

- Always keep the whipping cream, the vessel you are using to whip the cream in the freezer for 15 minutes before whipping.
- Do not do the icing on the cake when the cake is not cooled completely.
- Use electric hand blender to beat the cream, mixie will not work out for this.
- If making cake on a peak summer season , keep the bowl on a ice cubes and then beat the cream.
- Once the cream forms a soft peak stop beating this as it is ready for icing.
- Over beating of cream make it loose.
- While baking the cake do not open the door of the oven for the first 10 minutes. This will make the cake sink in the middle.