header

Monday 5 December 2016

Maida Sweet Paniyaram


Ingredients
Maida sweet paniyaram

  Preparation Time : 10 + Soaking time 30  mins |   Cooking Time : 20 Mins   Yields: 12

    Rava| Sooji  1/4 cup
    Maida | all purpose flour  1/2 cup
    Sugar     4 tblsp
    Baking Soda  a pinch
    Cardamon powder  a pinch 
    Oil   for deep frying  
Method:
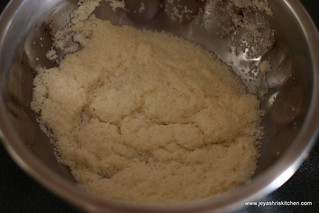
  • Soak rava in little water for 30 minutes.There should not be any water floating on the top. If so, drain it.
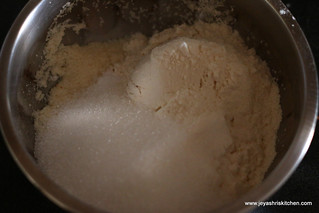
  • After that add the maida , sugar and the baking soda to this.
ravaadd-sugar-maida
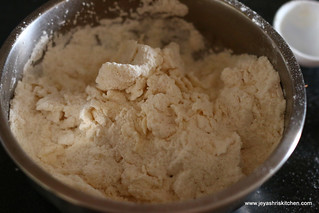
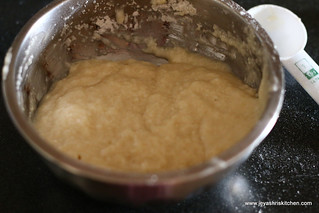
  • Add little water to this and mix it to a idli batter consistency. Ensure not to add more water. Just slowly add water.
  • The batter should be in dropping consistency.
mix-wellBatter-ready
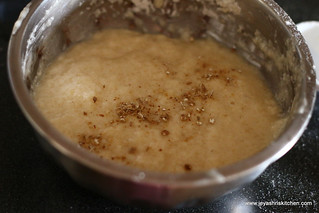
  • Add cardamom powder and mix well. Heat oil for deep frying.
Add elachiBatter
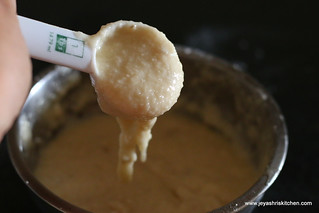
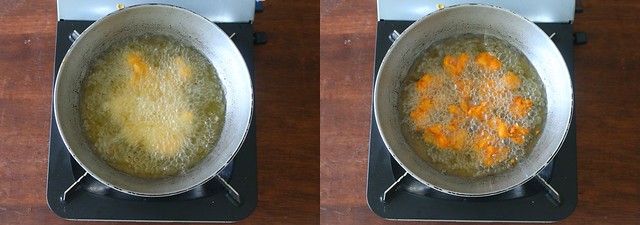
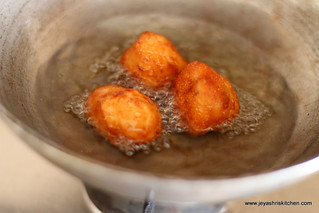
  • When the oil is hot add the batter with a spoon.Cook in a medium flame on both sides till golden brown.
frydeep-fry
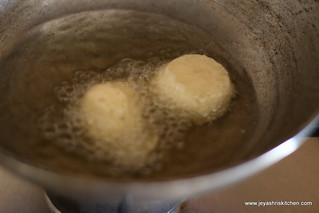
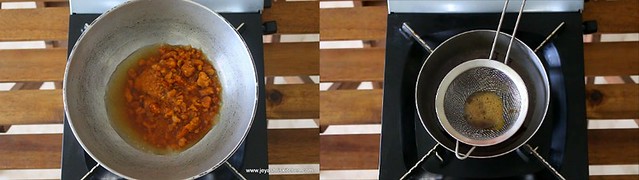
  • Drain it in a kitchen towel. Repeat this for the rest of the batter.
maida-paniyaram 
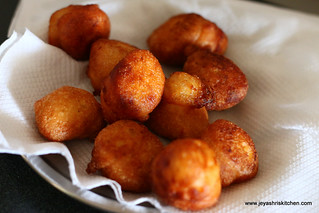
  • The paniyarams were very crispy outside and very soft inside.
Maida-sweet-paniyaram
Notes:
  • The sweet level was perfect, if you want more sweet add 1-2 tblsp extra sugar.
  • Do not add more water, let it be like a vada batter.
  • Always fry in a medium low flame.
  • If it is more watery, it will disintegrate after putting in oil.
  • You can add little maida if it turns watery.
  • You can add a small banana to the batter to make it more softer.
  • Do not add more baking soda than the quantity mentioned.

Cauliflower pakoda recipe


  Preparation Time : 15 mins | Cooking Time : 35 Mins |Serves: 3

     Cauliflower florets   2 cups
     Besan | Kadalai maavu  1/2 cup
     Rice flour   1/4 cup
     Red chili powder   1 tsp
     Salt   as needed
     Baking soda   a pinch
     Oil   for deep frying
     Chaat masala   2-3 pinches (optional)
                                         Video of how to make cauliflower pakoda


Cauliflower pakoda
Method:
  • Wash the cauliflower florets and keep it aside. 
  • In a pan add water and add little salt. Bring it to a boil. 
  • Add the cauliflower florets to this and let this stay in hot water for a minute.
  • Drain the water completely and keep it aside. 
cauliflower pakoda
  • In a bowl add the besan, rice flour, red chili powder, baking soda and salt. 
  • Add little water and make a thick paste out of this without any lumps. 
  • The consistency should be little thicker than an idli batter. Beat the mixture with a spoon nicely to get a nice airy batter. 
cauliflower pakoda 2
  • If you add more water by mistake add 1-2 tblsp of rice flour to bring it to the right consistency.
  • Add the cauliflower florets to this and mix well and let all the florets get coated with the batter evenly.
cauliflower pakoda 3 
  • Heat the oil for deep frying. When it is hot, bring the oil to medium flame and put the cauliflower florets in oil and fry in batches.
  • Let this cook and gets golden brown on the outer side. 
cauliflower pakoda 4
  • Once it is done take out from oil drain in kitchen towel. 
  • When it is hot sprinkle some chaat masala on this and serve hot. Adding chaat masala is optional, you can skip this too.
cauliflower pakoda
Notes:
  1. You can add ginger garlic paste to the batter.
  2. Ajwain | omam can also be added to the batter. 
  3. Ensure that the batter should not be too thin, else the batter will not get even coating and also will absorb oil.
  4. Keep the cauliflower florets ready and mix the batter just before frying. 
  5. I made the mixture on one shot and kept one batch without frying inside the refrigerator and fried after 3 hours. It turned out pretty well. 
  6. Do not fry in low flame. It will make the pakoras soggy. 
  7. Finely chopped coriander leaves can be added to the batter to give a nice flavour. 
  8. Enjoy the cauliflower pakoras | cauliflower pakodas with ginger tea or filter coffee.

Nel pori urundai

Nel pori urundai
 

  Preparation Time : 5 mins | Cooking Time : 25 Mins |Makes: 8 urundais

     Nel pori   3 cups
     Jaggery   1 cup (powdered)
     Dry ginger powder (sukku)  2 pinches
     Cardamom powder   a pinch
     Coconut bits   2 tblsp
     Ghee 2-3 drops
                                             Video of how to make nel pori urundai


Nel pori urundai
Method:
  • Clean 3 cups of nel pori and keep this in a wide plate. 
  • In a pan add jaggery and add 1/4 cup water.
  • Melt the jaggery. Always use powdered jaggery for correct measurements.
  • Once it is completely melted filter the syrup for impurities.
nel pori urundai 1
  • Boil the syrup again and allow this to boil until it forms a thick syrup.
  • Add the dry ginger powder, cardamom powder and coconut bits. You can roast the coconut bits in ghee also and add .
nel pori urundai 4
  • Check the hard ball consistency of the syrup by taking few drops of the syrup and dissolving it in a smal bowl of water.
  • If the jaggery forms a mass and when you put that mass on a plate is should create sound. 
nel pori urundai 5
  • Switch off the flame .
  • Pour the jaggery syrup on the pori and mix it well evenly using a ladle. 
  • Grease hands with ghee and start making pori urundais and paruppu thengai when it is warm enough to handle.
nel pori urundai 6
  • For making paruppu thengai take a big portion of the mixture and make the triangle shape. 
  • For pori urundais take a small portion and make balls.
nel pori urundai 7
  • When you come to the end of making balls, the syrup will get hardened and you will find it difficult to gather it and make a ball.
nel pori urundai 8
  • Keep the mixture on the flame for 10 seconds and the start making the balls. the jaggery will get slightly melted and you can make the balls easily. 
nel pori urundai
Notes:
  1. If the syrup is not in the right hard ball consistency, you can not make balls. 
  2. This can not be altered too. 
  3. For all varieties of pori this is the proportion of jaggery.

Thumbprint cookies


  Preparation Time : 20 mins | Baking Time : 10-12 Mins |Makes: 18-20 cookies

     All purpose flour | plain flour | maida   1 cup
     Butter    1/2 cup
     Vanilla essence   1/4 tsp
     Sugar  1/4 cup
     Jam   1- 2 tbslp approx 
     Vanilla essence   1/2 tsp


Thumbprint cookies
Method:
  • Soften the butter and powder the sugar. Add both together in a bowl and mix this nicely.
  • Add vanilla essence to this. 
  • Add the flour to this now and knead this into a pliable dough. If you feel that the dough is bit dry add 1-2 tblsp of milk to this and knead well without any cracks.
  • Make them into small lemon sized balls and slightly flatten it. 
  • Microwave the jam for 45 seconds and keep it ready. 
  • If you do not have a microwave you can keep the jam in a bowl of hot water.  
  • I used kissan fruit jam. You can any jam of your choice.
  • Make a dent in the center using your thumb and fill the dent with jam. Do not add too much jam, else it will over flow and spoil the appearance of the cookie when it is baked.
  • Alternatively you can use a cookie press to make shapes. 
  • Bake the cookies in an oven for 10- 12 minutes at 160 degree Celsius. 
  • Allow this to completely cool. The cookies won't change colour. 
  • Thumb print cookies are ready . Cool this completely in a wire rack and store the jam cookies in an airtight container.
Eggless cookies
Notes:
  1. If you feel the cookies bit soft when you take out from the oven, just allow that to cool completely and see, if it is still soft then bake for 2-3 minutes more.
  2. Do not add more jam to the dent, else it will overflow and splash all over the cookies while baking and spoil the look of the cookies.
  3. You can follow my eggless custard powder cookies recipe also to make this thumbprint cookies.
  4. Instead of jam you can add nutella too.